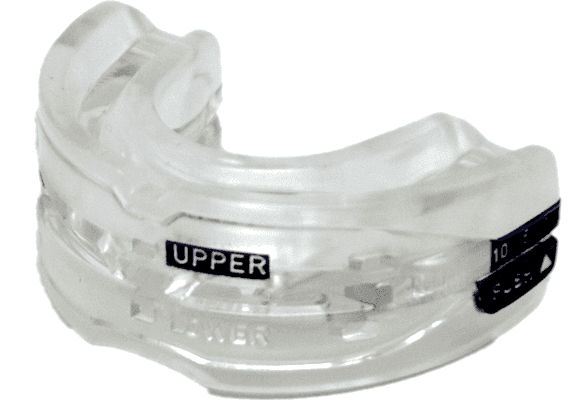
 As you can tell by looking at it, SnoreRX demands a little more attention devoted to cleaning than many other mandibular advancement devices (MADs). Having 10 lower jaw settings to choose from is a huge benefit for this device, but on the other hand, every little notch can harbor bacteria, so it’s vital that you are prepared to commit to cleaning your device every day.
The makers of SnoreRX states that it only needs to be rinsed with warm water every day after you are done using it. It also needs to be left to dry completely before putting it away. Warm water is not enough though. Sure, it is fine for those mornings when you are running really late and then you can give it a good scrubbing later.
Cleaning Recommendations
An ultrasonic cleaner is the most effective tool you can use to scrub into every crevice. A denture cleaner is a great option, too. This can get a little pricey if you use an effervescent table daily, so at least aim to just do this twice a week. A good old-fashioned toothbrush and toothpaste is a suitable option, as well. Again, no matter what you clean it with, it needs to air dry before placing it in a closed container. Never use ammonia, bleach, or any other type of abrasive cleaner on your device.
Taking SnoreRX Apart
SnoreRX is designed to stay together as one piece. However once the lower jaw is past the sixth setting, the upper and lower trays can be pulled apart for cleaning purposes. Never try to remove the soft pads that sit above the hard plastic. They are not made to be removed or replaced.
To reconnect the two trays back together, squeeze the sides and gently slide the lower tray back into position.
The post How to Clean Your SnoreRX appeared first on Snoring HQ.
No comments:
Post a Comment