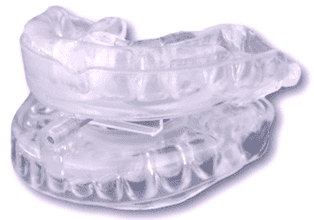
 Most people who purchased a SomnoGuard are going to have their doctor or dentist handle the fitting process. This is especially true if your provider is already carrying the product and it is available to you immediately. However, if you are one of many snorers who obtain the prescription and then orders directly from the manufacturer, you might not want to schedule another appointment that you may need to pay for just to have your device fitted. The fitting process is a little different than what you would do for any other mouthpiece that requires the boil-and-bite technique. However, it is certainly not so difficult that you should worry about handling it yourself.
- If your device is not already in two pieces then separate it into two parts now before you begin.
- Bring a small pot of water to a boil and pour it in a bowl. It does not need to be to a full boil to work, but it should be hotter than what runs out of your tap.
- Submerge the upper tray in the water for 3 minutes. The combination of heat and water will make the material pliable.
- Remove your SomnoGuard from the water and allow it to cool for a few seconds, so it is not uncomfortable to touch.
- Press the upper tray against your upper teeth, but do not bite down.
- After a few seconds remove it from your mouth and place it in cold water. This will harden the impression that you just made.
- Bring water to a boil again, and then pour it in the bowl.
- This time, submerge the lower tray of the device for 3 minutes.
- Remove from the water, and attach it to the cooled top tray.
- Place it in your mouth and bite down firmly. Since the upper tray is cool the only impression being made is of the lower tray.
- The lower tray goes in cold water to harden now while the upper tray gets submerged in hot water once again.
- Attach the two pieces together again, place it in your mouth and bite down firmly. Since you already have teeth impressions on the top tray, your teeth should glide ride into place. The lower tray is now cool, so it will not be affected by your biting.
- Remove your mouthpiece from your mouth, and cool it in cold water.
- Adjust the lower jaw placement accordingly.
The fitting process is for the SomnoGuard devices that are two pieces. Since SomnoGuard 3 is one piece the instructions will differ slightly. Be sure to read through the manufacturer’s instructions, and when in doubt have your doctor or dentist help you.
This video details the SomnoGuard fitting process
The post SomnoGuard Fitting Guide appeared first on Snoring HQ.
No comments:
Post a Comment